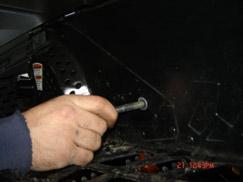
1. Suspend the rear end of the snowmobile, lifting the track slightly off the ground.
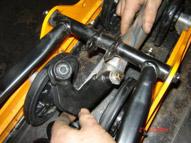
2. Using a 3/8 drive ratchet and a 16mm socket remove the two rear suspension bolts.
3. With the suspension free from the tunnel, remove the bushings and axles from the front arm. The front arm axle and bushings will be re-used during re-assembly.
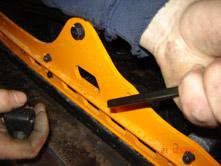
4. Place suspension on a good working surface. Use the 3mm Allen wrench to remove the upper idler wheel retainers on the rear arm. Remove upper idler wheels. Retain upper idler wheels and retainer for re-assembly.
5. Set both torsion springs at the lowest setting (#1), then carefully remove the lower torsion spring retainers from the rails using the 13mm wrench and the 6mm Allen wrench. CAUTION- Be sure to have a secure hold of the torsion spring when you remove the retainers to prevent injury.
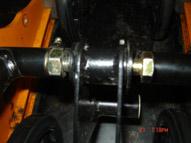
6. Loosen the rear arm lower bolt pivot bolt, shock bolts, and throttle rod bolts. Retain all bolts, washers. Discard all nuts. The rear arm, throttle rods, and torsion springs will not be reused.
7. Remove stock rocker arm mounted to front Arm. Install new rocker arm with newly supplied bushings, using the existing bolt and new 10mm nut provided with your E- Motion kit.
8. Install a new E-motion rear arm attaching rear pivot first. Use the existing bolt and new 8mm flanged nut. Torque rocker arm bolt to 35 ft. lbs.
9. Verify that the new throttle rod spacers in the rocker arm and the rear E-Motion arm move freely. Verify there is movement on the upper spacer for the upper rocker arm mount.
10. Install new throttle rods using the stock bolts removed and new non-flanged 8 mm nuts.
11. With the throttle rods mounted, install rear shock. Use the 8 mm bolt and flange nut supplied. For ease of installation, install the lower shock mount in the rocker arm first. Do not tighten at this time.
12. Mount the shock to the E-motion arm with the Evol chamber connected to the lower rocker arm, and down towards the track
13. Torque shock and throttle rod bolts to 18 ft. lbs. Install new rear arm axle into E-Motion arm and install stock idler wheels and retaining rings. Use 242 Loctite on the 3mm Allen to prevent the screw from backing out.
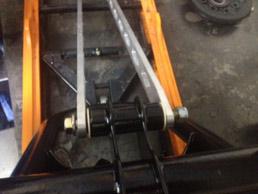
15. The Rear arm should now be complete. ensure the system moves freely. (Note: Bushings will be a little sticky when new.) CAUTION: DO NOT TRY TO COLLAPSE SUSPENSION OUT OF SLED! DAMAGE COULD OCCUR. (SHOCK SHOWN MAY BE DIFFERENT THAN ONE SUPPLIED IN YOUR KIT, DUE TO IMPROVEMENTS AND UPGRADES TO SHOCK!)
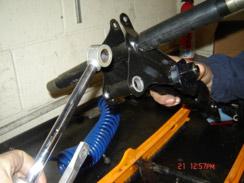
16. Loosen one or both (depending on year model), limiter straps by removing the bolts and nuts from the lower part of the limiter strap. Remove upper shock bolt and lower shock shaft. Set bolt aside to be re-used during re-assembly.
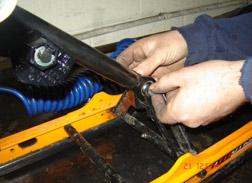
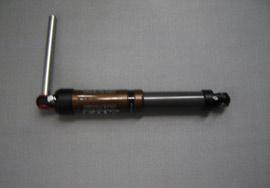
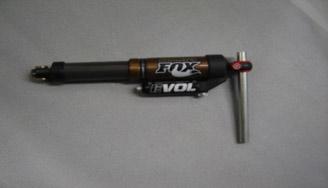
17. Remove the stock shock cross shaft from the stock shock. Install cross shaft into the new Float shock, lightly greasing the shock shaft to help the installation process. Push cross shaft through shock bushing, use the plastic mallet if necessary. Equally locate the shaft on the shock, re-using stock spacers. Reinstall shaft with shock into rails, re-using all axle washers, shaft bolts. Depending on the type of front track shock supplied with your kit, typically have the Schrader valve pointing to the back of the suspension. Torque to 45 ft. lbs. Re-install the top shock bolt and the new Nyloc nut. Torque to 35 ft. lbs. Re-install limiter strap and bolts. Torque to 97-inch lbs.
18. DOUBLE-CHECK ALL NUTS AND BOLTS TO ENSURE PROPER TORQUE. Tom's Snowmobile & Service IS NOT RESPONSIBLE FOR IMPROPER INSTALLATION.
19. The suspension is now ready to be reinstalled. Slide suspension into track front first and get the suspension to rest in the proper location in track lugs. Make sure bushings and shaft are placed in the front arm and install bolts. Bring the rear arm into position and mount with 10mm bolts and washers supplied with a little blue Loctite.
20. Torque the four suspension bolts to 35 ft. lbs.
21. With skid now installed check all parts one last time. With NO AIR IN SHOCKS cycle suspension to verify everything moves freely and suspension stops fully bottom out.
22. Lift suspension fully off the ground and set air pressure for your riding style.
23. Thank you for your purchase. Any feedback is greatly appreciated.
